Introduction to Docman Connect
Docman Connect is a document transfer platform that provides a secure, reliable and flexible platform for the electronic communication of documentation between Secondary, Primary and Social Care providers.
Docman Connect enables transmission of documents from clinical systems ready for collection by any End Point*. Docman Connect accepts feeds from multiple Secondary Care systems with one link to the End Point. By sending documents electronically, Sending Organisations are able to not only meet delivery targets such as 24 hour discharge summary, but they can also make significant savings by removing printing and postage costs. Full benefits can be provided and discussed with your Deployment Manager.
Docman Connect is able to collect from multiple message streams enabling GP Practices to receive from multiple document sources. As documents are received by GP’s electronically, this enables them to workflow documents instantly and allows clinicians to remain up-to-date with all patient information.
Accessing Connect
You can access the Live Connect Delivery Console by clicking the link below.
https://console.docman.thirdparty.nhs.uk/
If you are trying to access the Sandpit Connect Delivery Console then use the link below
https://console.ss1.docmansandpit.com
You will be presented with the screen shown below:
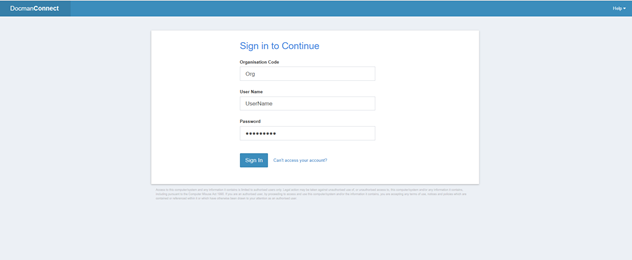
Basic Login Details
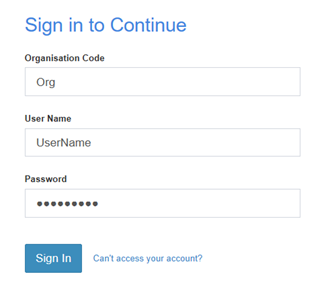
There are 3 fields that need to be populated when logging in Organisation code, User Name and Password.
Organisation Code – is the ODS/NACS code of your organisation.
User Name – will have been assigned to you by the administrator of the users for your organisation, if you don’t have a username consult your administrator.
Password – will be automatically sent to the email address specified for the user, please be aware that this password is only a temporary password and will require changing on first logon.
Once organisation access has been provided, you will then have the permission to setup other users.
If you are an API user and need more information please consult the POSTMAN site at the following URL https://documenter.getpostman.com/view/18488540/UVJbHdBa
Retrieve Username
To retrieve your Username, go to the login screen and click the “having trouble signing in” link
Select “Can’t access your account?”

Choose “Retrieve User name”
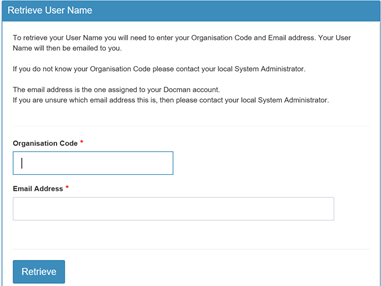
- Insert your Organisation Code and your email address
- An email will be sent to your registered email account detailing your User Name
Reset password
Through the same the login screen, you can reset password by clicking the “having trouble signing in” link

Select “Can’t access your account?”
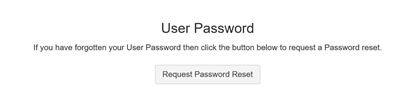
Choose “Request Password Reset”
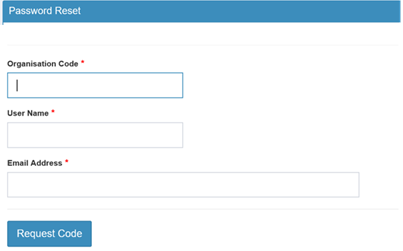
Insert your Organisation Code, Username and Email Address
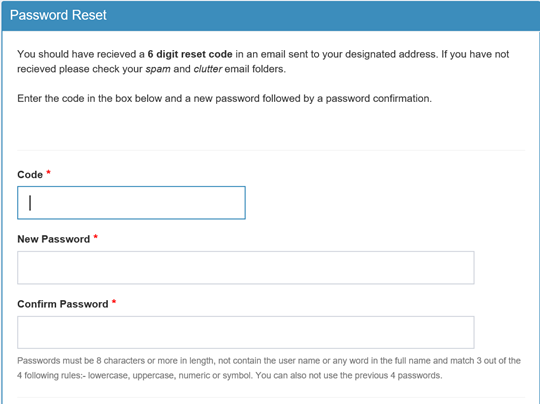
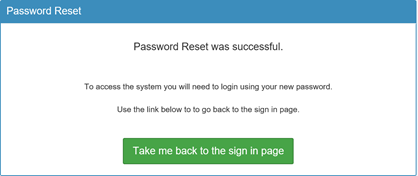
The following screen will then prompt you to check emails for new 6 digit reset code.
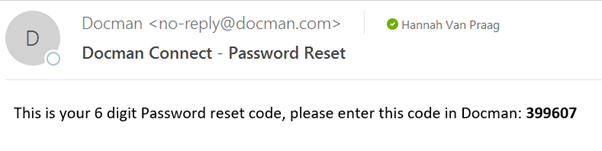
Check your email for an email from Connect.
Insert your 6 digit reset code and new Password and Confirm Password.
2 Factor Authentication
You may be prompted with the screen below upon login, this will only occur if your user login has been configured to require 2 Factor Authentication, if you haven’t been setup for this then you can skip this section.
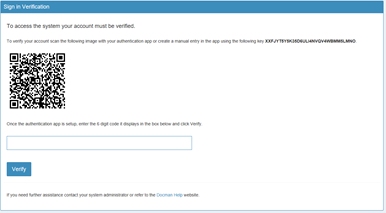
2 factor authentication is an additional layer of security to keep your account safe. Using 2 factor authentication requires a mobile phone with an authentication app provided by either Microsoft or Google. You can find these apps on the Android/Apple app stores and are free to download.
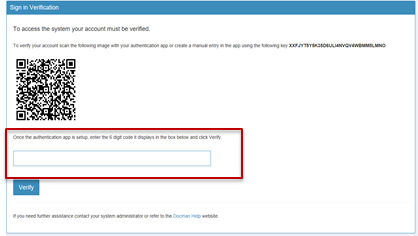
Once you have installed the authenticator app you will have the ability to add an account. Adding an account will trigger the camera of your phone, likely with a square on screen. Line up the square with the QR code on screen (shown below).

This will link your account to the app and provide you with a 6 digit code that changes every 30 seconds, enter this code to login.
For more information on the Microsoft 2FA app see the Microsoft user help link below.
https://docs.microsoft.com/en-us/azure/active-directory/user-help/microsoft-authenticator-app-how-to
Once entered you will have access to the application, each time you login you will be required to enter a new 6 digit code generated by your authenticator app.
Once logged in, you will be greeted with the landing page. From here you can navigate to the area you wish to work on first.

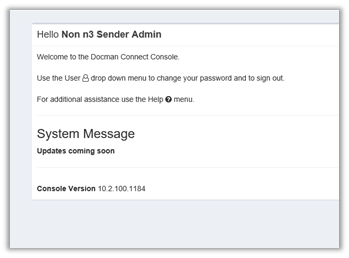
System Messages
Within System Configuration, you can allow a System Message to appear on logon to alert you of upcoming releases. This appears like below:
Managing Documents
Document List – Access
The document list shows the list of all of the documents you (or Groups) have sent. You can access the document list at any time using the top navigation bar.

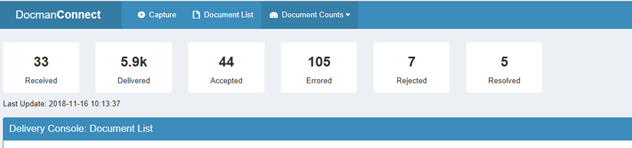
Document List – Counts
By selecting the Document Counts option you can see the number of documents at each status for your organisation. If you are part of a group then these numbers will be filtered appropriately.
You can expand and collapse this option by pressing the button repeatedly.
Document List – Information
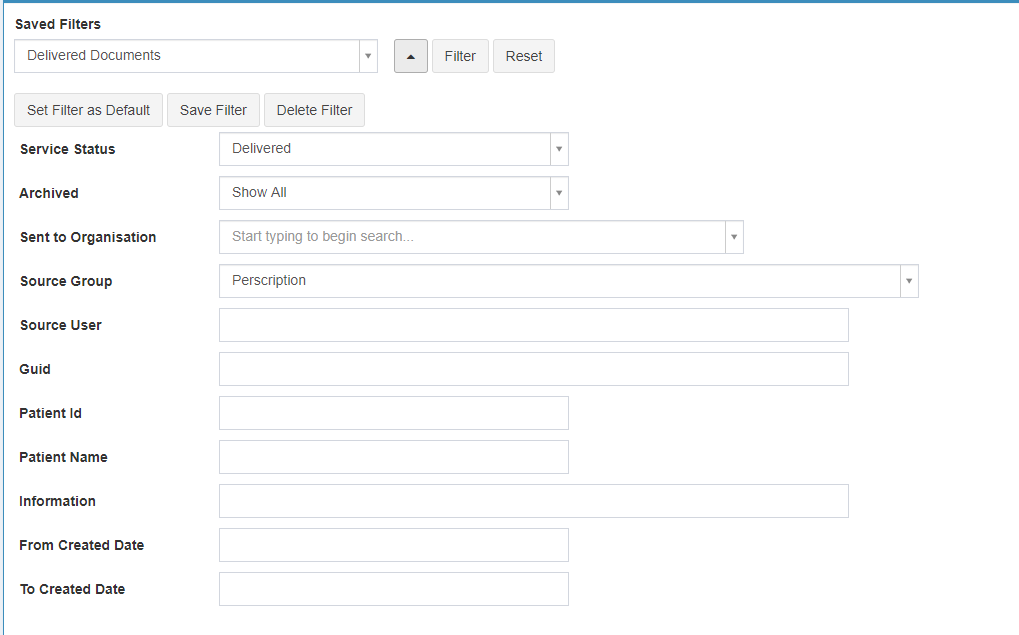
By expanding the filter option, you can choose to narrow your search using any of the column headings. You can save up to 5 filter templates which you regularly use. Filter templates can be saved and set as default once the filter has been run once.
- Run filter
- Save filter
- Choose a filter to save as Default
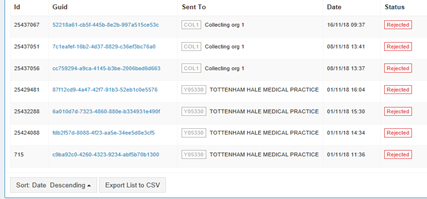
Below this will be the results from a filter
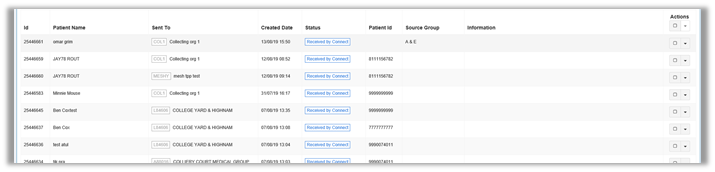
| ID | This column shows the ID assigned to the document, this is different to the GUID which is held in the document details and is generally used to identify the document. |
| Patient Name | The name of the Patient the document sent regarding. |
| Sent to | Shows the name and ODS of the endpoint the document was sent to |
| CreatedDate | Shows the date the document was posted |
| Status | Shows the status of the document (Received, Delivered, Accepted, Rejected, Errored, Resolved) |
| Patient ID | Usually the Patient’s NHS Number |
| Source Group | The group within the organisation that posted the document, users are assigned to groups when created, users can only see documents for their group, having no group will allow a user to see all documents for the organisation. If you are an API user then the group will equal the Department the document is posted with, you can then setup users with a group matching the department name to limit users to seeing documents for that department only. |
| Information | Information shows any information that may have been passed back with a rejected document. |
| Actions | Actions is a drop down that allows users to resend a document, add a note, mark a document as resolved or view its full details. You can also multi-select to action in bulk |
Document List – Filters
The document list has a number of filters available to allow you to focus on specific groups of documents, i.e dealing with Rejections
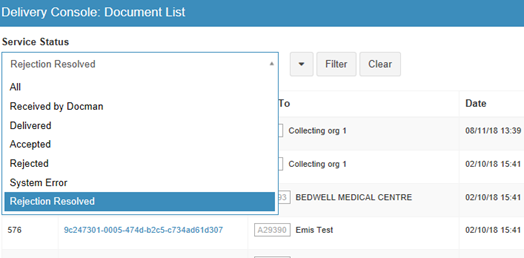
By default the full filter will be collapsed, only showing the service status as an option for filtering (shown below).
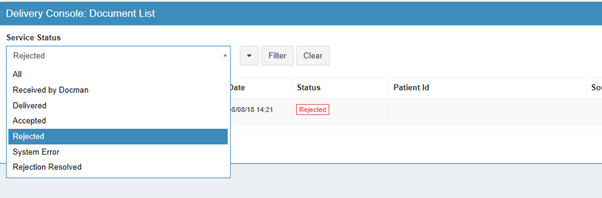
Selecting any one of these options and pressing the ‘Filter’ button will filter the list to only show documents with the specified status. If you want to clear a filter you can press the ‘Clear’ button at any point.
| Received by Docman | Received by Connect, via API or created in Connect |
| Delivered | Shows all documents that have been successfully delivered |
| Accepted | Shows all documents marked as accepted by the endpoint |
| Rejected | Shows all documents marked as rejected by the endpoint |
| System Error | Shows any documents that have errored and need to be resolved by Docman |
| Rejection Resolved | Shows any rejections marked as resolved by the user i.e this was rejected but I have actioned it |
Document List – Actions
Document actions are accessible at the right hand side of the document:
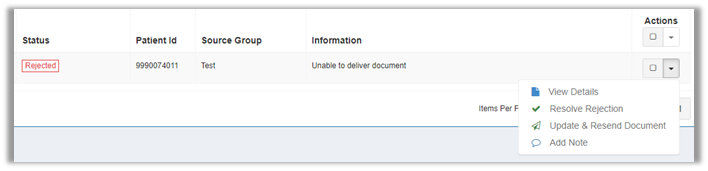
The actions available will change contextually with the status of the document and the users permissions. The actions available and what they do is shown below.
| View Details | Allows you to view the details of the document (details, preview, metadata, timeline). |
| Resolve Rejection | Will mark a rejection as resolved, this is designed to help users to manage the rejection list. Resolving a rejection will remove it from the list of rejections without deleting it. |
| Amend and Resend Document | Will resend a rejected document to the endpoint once you have made an amendment i.e changing some information. Please note this will send a new document reference ID (GUID) |
| Add Note | Allows the user to add a note to the document, this will also be copied into the metadata and will be visible to the endpoint. The text will also be logged against the timeline |
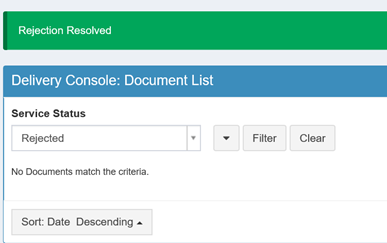
Document List – Resolve Rejection
Resolving allows the user to indicate that a rejection doesn’t require any further action, this is more of a tool to help organisations with multiple users reviewing the same rejection list, resolving allows items to be moved out of the rejection list once action has been taken.
Document List – Document Details
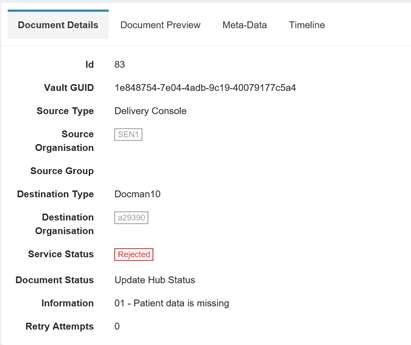
| Document details | Gives information on status and rejection reason |
| Document Preview | Allows you to preview the document. This would help in determining if the user rejection reason is valid |
| Metadata | Shows the metada associated with the document including description, event date and time posted to Docman Connect, patient ID |
| Timeline | Shows a picture – Posted to Connect, Received by Practice, Rejected by practice. |
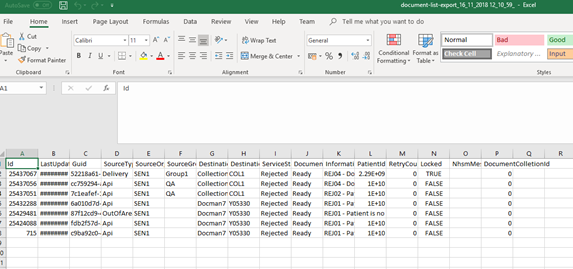
Document List – Export to CSV
Users can Export their document list to CSV. Exporting to CSV will reflect any filtering done using the document list filters. For example you could filter the list by the “Sent To” organisation and then only export a list of documents sent to that endpoint.
The list of documents will be exported in a csv format and will look like the screen shown below.
Capture and Print
You can access the capture feature at any time via the Capture option in the top navigation bar.

Capture Screen
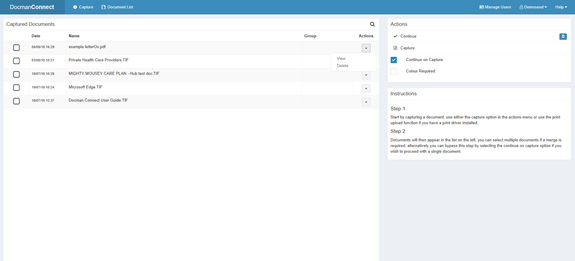
- On the left you have a list of files that have been uploaded via the capture option or sent to Connect via the Print driver.
- You can view or delete any of the files by clicking the actions drop down.
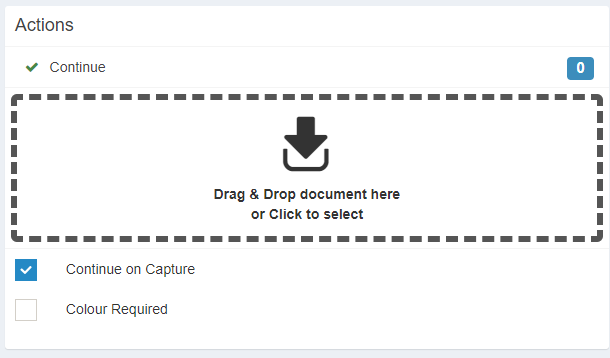
- You will also see a list of actions on the right hand side.
- You will see a count of the total number of documents selected.
Capturing a Document
To capture a document you need to start by selecting the Capture option on the right hand side. This will bring up a window for you to select a local file for upload. You have a number of options here.
- Select a single file for upload – with continue on capture checked. When capturing a file this will allow you to select a file to be uploaded that will immediately converted and place you in the OCR/Data Detect screen.
- Select single file for upload – without continue on capture. When capturing a file this will allow you to select a file to be uploaded that will be added to the list of files, this will allow you to merge it with other files in the list before continuing to the OCR/Data Detect screen.
- Select multiple files for upload – with continue on capture checked. When capturing a file this will allow you to use CTRL or Shift to select multiple files, these will be immediately converted to TIF, merged and place you in the OCR/Data Detect screen.
- Select multiple files for upload – without continue on capture. When capturing a file this will allow you to multiple files to be uploaded that will be added to the list of files, this will allow you to merge them with other files in the list before continuing to the OCR/Data Detect screen.
Printing a Document
Adding documents to the list of files can also be done using the print driver (see embedded doc for installing the print driver).
Once the driver is installed simply view the document in whichever desktop application is required to view it, then select print and select Docman as the printer.
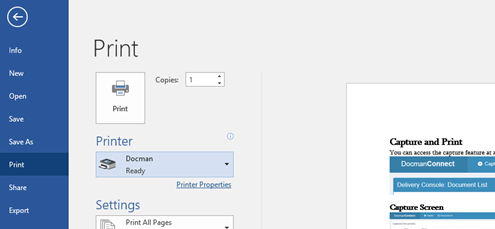
Pressing Print will then add the document to the file list in the same way capturing does.
You should have entered your print key when installing the print driver, this will ensure any document that is printed will be linked to your group (if setup with one).
Drag & Drop
You can also capture a document by ‘drag and dropping’ from a folder or desktop. You will be taken immediately to the OCR/Data Detect screen.
OCR/Data Detect
After continuing the document will run through the OCR/Data Detect process.
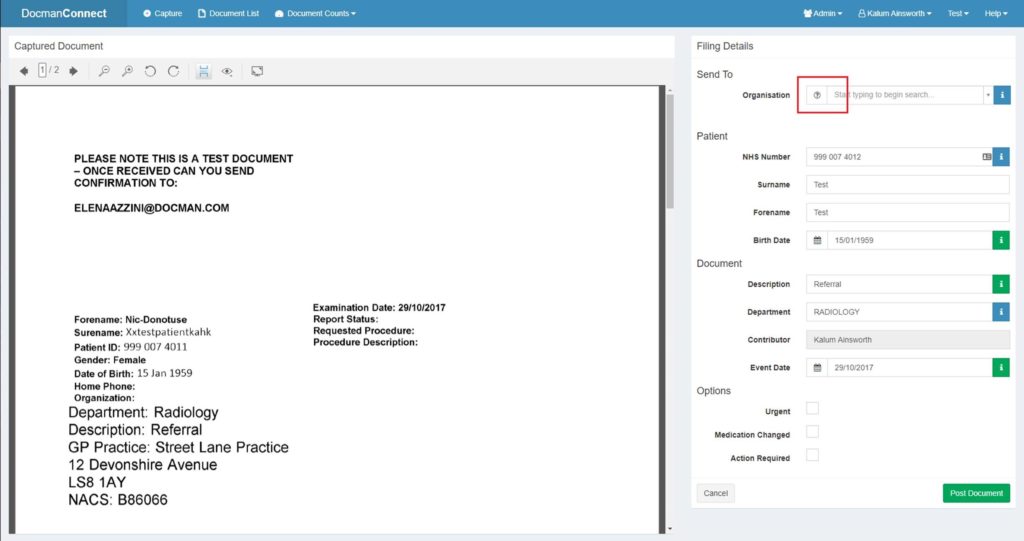
The OCR process will scan the document and pick out as much of the data (known as metadata) from the letter as possible. Connect will then place the value it believes to be correct into the box next to each value e.g. Forename – Test.
At the same time, if activated, Connect will check the Patient and receiving Organisation details against the National Spine Mini Service.
This prompts you to check against the Spine, if its a match, the ‘?’ will turn to a ‘✔’. If not, you will be prompted with one of the following responses:
Spine Responses
| Spine Response | Description | Advice |
| No match was found for entered NHS number and Date of Birth | NHS number or DOB is incorrect | Recheck Patient details and try again |
| NHS Number entered is not verified, please try another | Spine does not recognise the NHS number provided | Recheck Patient NHS number and try again |
| The record checked by SPINE related to the entered NHS Number and Date of Birth is invalidated, please choose correct data and search again | NHS number no longer used | Recheck Patient details and try again |
| The SPINE search for this Nhs Number and Date of Birth detected a new NHS Number, please input the newest NHS Number for this patient | Patient NHS number superseded | Recheck Patient NHS number and try again |
| NHS Number entered is not in the new style, please input a correctly formatted NHS Number | NHS number in old format | Find Patients newly formatted NHS number and try again. |
| SPINE check did not return successfully | Spine returned other error | Check response code found in error |
If you choose not to check against the Spine at this point, the same check will be made when you hit ‘Post’.
You will also have the ability to ignore the response and send anyway.
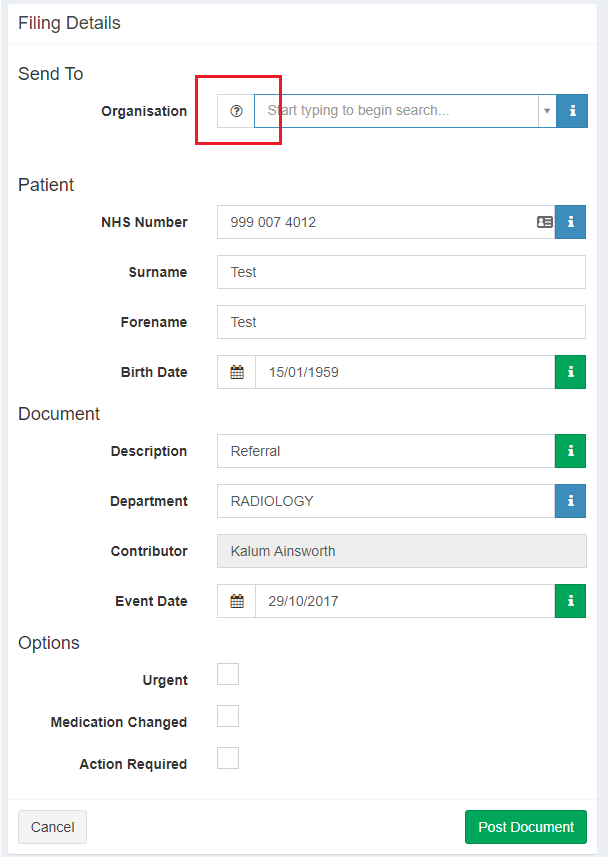
For document information such as Description and Department, if multiple values are found a green ‘i’ will be visible. By clicking the ‘i’ you will see a drop down of any other values the system believes could be correct for that metadata item.
Alternatively you can type into these boxes if the correct value is not identified.
Posting a Document
The final step is to post the document, once you are happy with all of the data selected/entered into the fields, you can additionally mark the item with some of the check boxes below, this is an additional flag to the endpoint.
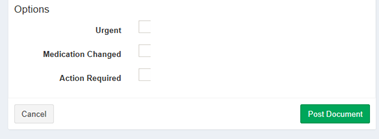
Once posted the document will enter a queue for sending, once sent its status will change from ‘Received’ to ‘Delivered’.
Managing Responses
After a document is sent its status moves to ‘Delivered’, this status indicates that the document is awaiting review by the End Point.
The document could equally move to the ‘Errored’ status, this status is monitored by the Connect team and will either be resolved by them or they will contact you if your input is required for resolution.
Assuming the document is sent successfully then following review it will either move to ‘Accepted’ or ‘Rejected’.
If its Accepted then there is no additional work for you, the document has arrived and, from the End Point perspective, is correct.
Rejected Documents
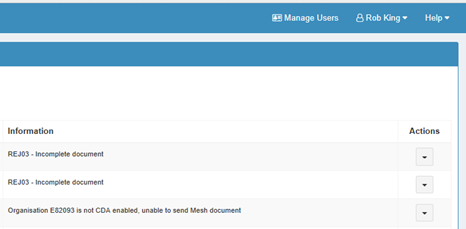
You will see a rejected document in the document list and the reason for rejection will be clearly shown in the information column (shown below).
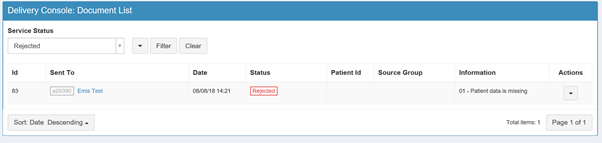
The majority of rejections will fall into the following 6 groups, this information is specified in the “information” column.
REJ01 – Patient is no longer registered at this practice
REJ02 – Patient never registered at this practice
REJ03 – Incomplete document
REJ04 – Document cannot be viewed
REJ05 – Duplicate document already received
REJ06 – {Custom Reason provided by user}
REJ07 – Deceased/End of Life
REJ08 – Invalid Document
If you were previously a Hub user, you may be familiar with system rejections, these are now categorised as “Errored” and will be managed by the Connect team.
Rejected Documents – Actions
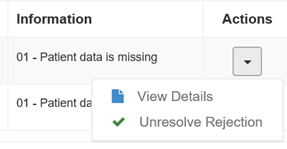
Now that we have a rejected document we need to decide what action needs to be taken. Selecting the actions drop down we have a number of options specific to rejections.

Rejected Documents – Resolve Rejection
If there is no further action to be taken a rejection can resolved. This will remove it from the list of rejected documents, you can access the resolved documents by filtering the document list to the “Resolved” status.
If you accidentally resolve a rejection you can also unresolved it from the actions drop-down.
User Setup
Connect has different roles that can be used depending on the actions that the user needs to undertake when using the console. Your Docman representative will be able to create you an admin user, your admin user can then create Users for themselves.
If you have a large number of users these can be setup in bulk. This is done using a CSV template contact your Docman representative for more details.
Different Roles
| Sending User | User has the ability to Capture documents to send out to practice and view their own document list |
| Sending User Admin | User has the ability to Capture documents to send out to practice, view their own document list and also User Management for their organisation |
| Sending User Admin with View Group Captured Documents | User has the ability to view documents sent by a Group, i.e a Team Leader |
| Sending User Manage My Organisations Users | User has the ability to administer users within the Organisation, i.e IT Team |
| Collection User | User has the ability to view document list and download documents that have been sent to their Organisation |
| Collection User Admin | User has the ability to view document list, download documents that have been sent to their Organisation and also User Management for their organisation |
User Management
To setup users an Admin account is required, your Docman Project Manager will configure your first admin account.
Once logged in with your admin account you will see a link to Manage Users in the top right of the page.
This will take you to your list of users.
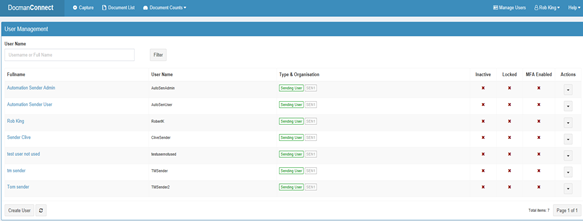
The primary options for use here are the create user, in the bottom left and the edit user which is a drop down from the actions arrow.
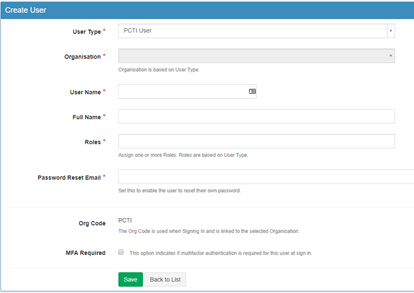
Creating Users
Selecting the “Create User” option will move you to the user creation screen, there are a number of fields that need to be populated here.
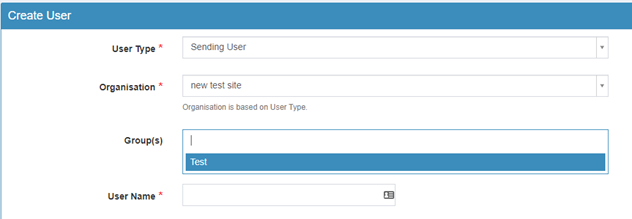
Groups – Once an admin user gains access to the Connect console for the first time, it is best practice to setup any user groups needed for your organisation. You can specify a group and link this group to your organisation e.g. “A&E” linked with ODS “SEN1”, doing so will add this user to a group that allows them only to see documents with an “A&E” group. Any other documents will not be visible to them.
It is also possible for users to be assigned to multiple groups (changing user groups can be found on page 38).
User Name – Username is what will be used by the user to login and is specified by the user creator
Full Name – The full name of the user being created
Roles – The roles are a drop down that you can select from generally you will get Sending User and Sending Admin or Collection User and Collection Admin.
Password Reset Email – Password reset email is the email address that will be contacted should the user need to reset their password.
Reset Password – This check box can be selected to force the reset to change their password from the password that is set on creation.
Org Code – This shows the org code that the user is associated with, this needs to be entered upon login.
MFA Required – MFA required forces the user to use 2 Factor Authentication to login.
Once these fields are populated you can click create user and the user will be added. After the user has been created an automatic email will be sent to the email address specified when creating the user account which will include both the username and password.
Edit User
Selecting the Edit User option will allow some of the user information to be updated.
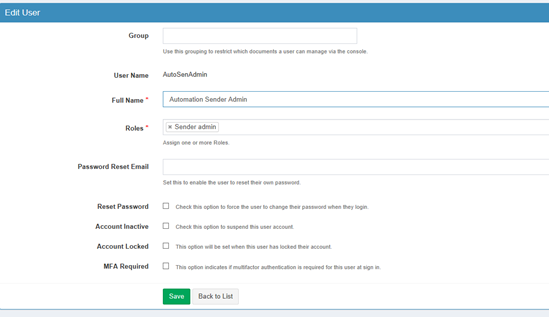
You can change some of the information added in the user creation process.
In addition you can manage an account being inactive or not (an inactive account cannot access Connect).
You can also unlock an account if it has been locked.
Bulk User Upload (Advanced Only)
Advanced users have the ability to bulk upload users if the requested by the customer, the first step to this is to go to the User Management section. Once upon you will see the “Bulk Upload Users” button next to the “Create User” button.

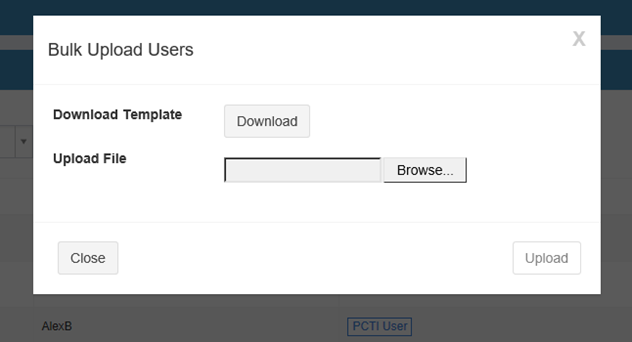
Selecting the “Bulk Upload Users” button will bring up the pop up shown below. You have 2 options here, you can browse straight to a csv with user details that you want to upload, however the information is required to be in a specific format so you will likely need to download a template before attempting that step.

Selecting “Download” will download a csv template for you to fill out at the bottom of the page.

The csv will contain the required headings.
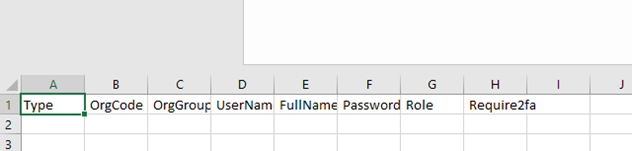
| Type | This is the user type, options are “PCTI User”, “Sending User” or “Collecting User”, the most used option for a standard Connect customer will be “Sending User”. |
| OrgCode | The org code of the organisation that the user will work within |
| OrgGroup | The group within the organisation if the user needs to be restricted |
| UserName | The Username needs to be unique for the organisation but can take a format to suit preference, in general first letter of first name and then last name has been used e.g. Robert King = RKing |
| Full Name | The full name of the user being created |
| Password Reset Email | The email address of the user being created, this will be used to reset passwords to so should be valid. |
| Role | The role of the user being created, e.g. Standard Sending User or Sender Admin etc, |
| Require 2FA | Whether the user requires two factor authentication or not, this can be set to “0” to have 2FA turned off or “1” to have it turned on. |
All users will be created with a password of “Password123” and the box checked that forces users to change their password upon first login.
Save the CSV locally and then return to the “Bulk User Upload” pop up, browse to the file location and select upload.
You may have issues with the upload which will prompt you to download a notepad file that summarises the issues.
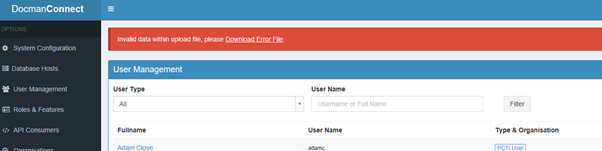
The errors will advise which row of the csv had an issue and what the issue was.

You can try and resolve any issues, save locally once more and then re-upload.
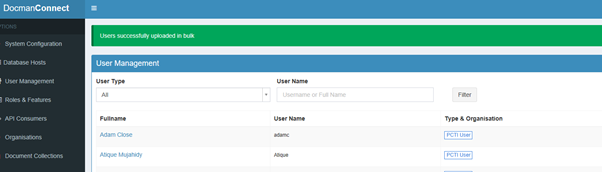
If you upload with no issues you will get the success message below and the users will have been created.
Group Setup
Originally a group was just a free text field populated against a user that would then filter down any document lists to only show documents with a matching group. In version 87 this was overhauled.
Groups are now created as part of the setup process. A group will often represent a department (A&E etc). Users can then be linked to a group once it has been created to see documents related to that group. One of the most important new additions in 87 was the ability for users to be linked to multiple groups and then swap between them. We will go through this in detail below.
Creating groups
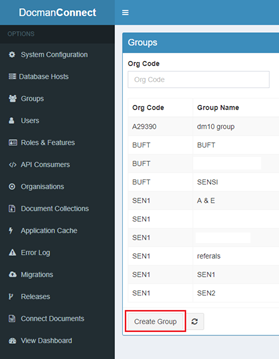
To create a group select the ‘Groups’ option from the left-hand navigation bar.
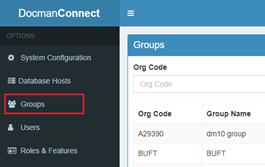
You will be presented with a list of existing groups and an option to ‘Create Group’ with a button at the bottom of the page. You can also use the search to filter the group list if required.
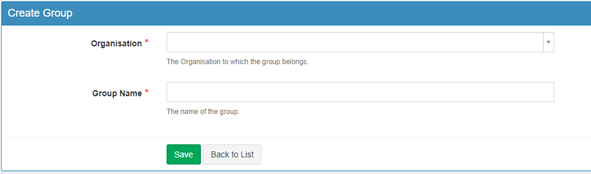
If you select “Create Group” you will get presented with the page below. In order to link the new group to your organisation you will first need to find and select your organisation using the search functionality provided. You can either search by organisation name or ODS/NACS code.
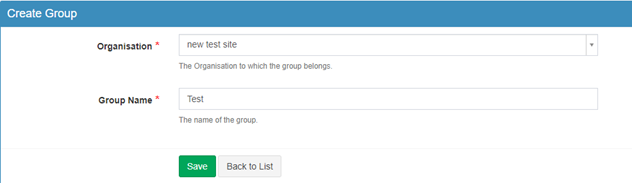
For the purpose of this we will create the ‘Test’ group, once you press save it will then appear in the group list.
Once created it will be available for use, you can assign it to a user in the create/manage user screens.
Changing Groups
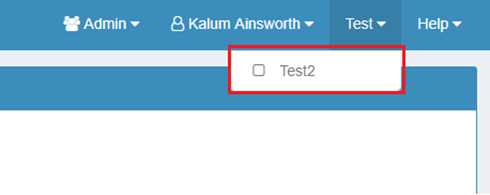
If a user has multiple groups assigned to their user account the then user will now have the option to switch between user groups.
Once logged in, in top right-hand corner, to the right of the username you will see one of the assigned group names.
Simply click on the current group name which will provide a dropdown list of all user groups assigned to the user, then select the group you would like to switch to.