
In Connect, there is the functionality to specify ‘Groups’ when sending documents. The concept is that you are able to separate documents by either a team, letter type, department or however you choose to use it.
In turn, you are able to sort within the Connect Console views of these groups therefore enabling you to report on the use of them.
For example, you may wish to use Groups as the different letter types you send:
- Discharge Summary
- Blood Test
- Clinic Letter
- Outpatient Letter
- Care Plan
Please visit the Connect User Guide on how to setup Groups
Once created, you are also able to assign users to one or more of the Groups. Or perhaps you are a Team Manager, you may wish to be part of all Groups, therefore you leave the Group option blank.
When you have all of your Groups created and users assigned to them, you will be able to instruct users to send their letters referencing the relevant Group.
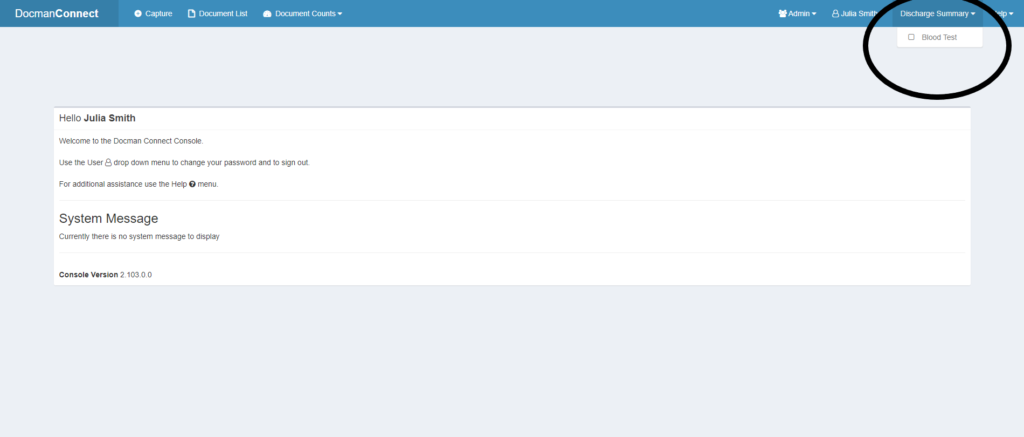
For Capture Console users:
In the top right hand corner of your Capture screen, you will have the ability to switch Groups to the one you wish to send under:
When capturing a document, you will now send under the Group you have selected.
If you are in a Group with other members of staff, you can select ‘Show Group Documents’ to show other documents that have been captured by the same Group. This is particularly useful if more than one person sends ‘Discharge Summaries’ for example. Or if the usual member of staff who sends these documents is on annual leave, and someone else is picking up their work.
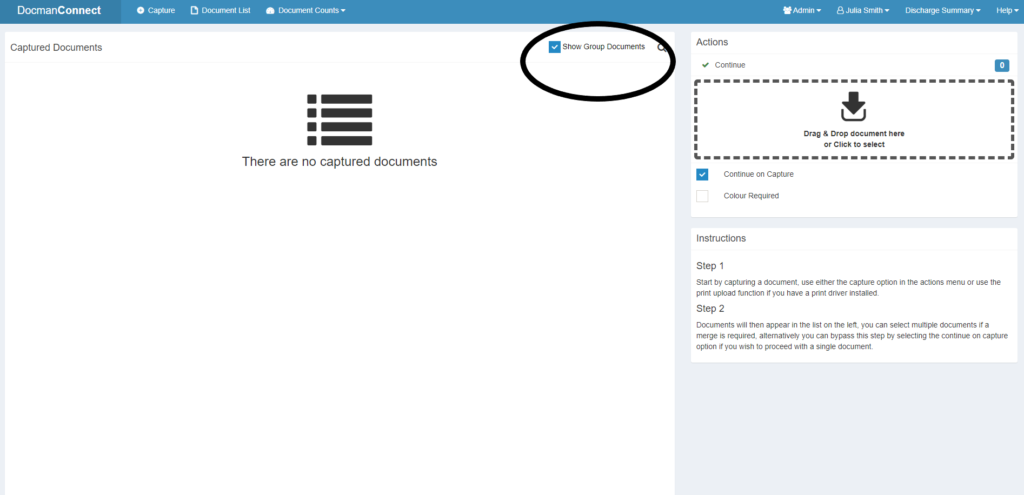
Please note whilst the Group can contain more than one individual, the ‘Contributor’ will always be unique and specify the user’s name.
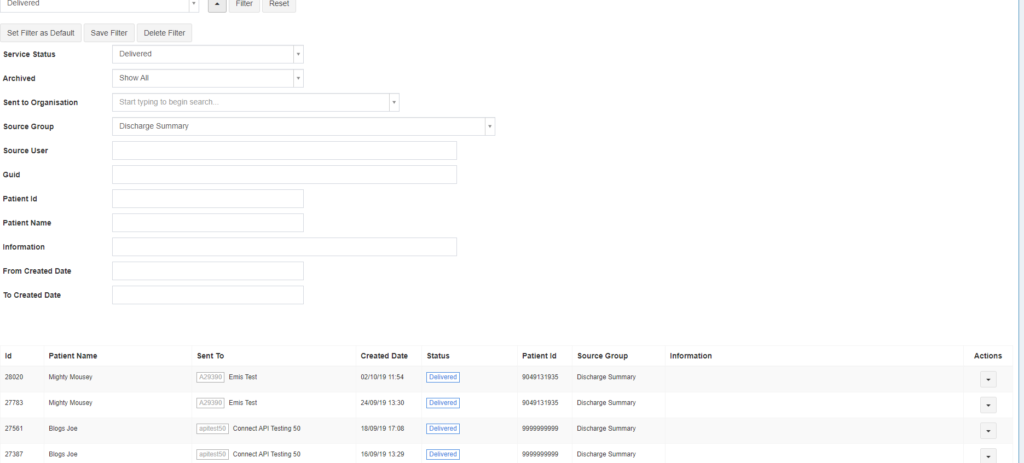
Once you have sent your documents, you can then use the Document List filters to look back at the documents sent under your group, in this case, Discharge Summary:
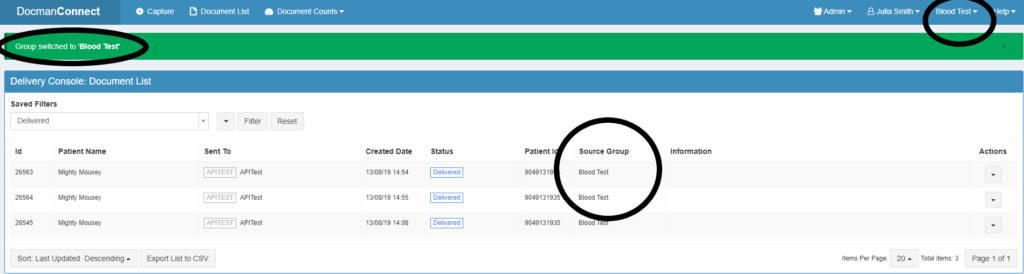
You can also switch Groups again through this screen to reveal documents sent under other Groups:
For API users:
In order to send under the Groups you have created, you must specify the Group within the Sender Object in the JSON, for example:
“CaptureSource”: 2,
“RecipientOdsCode”: “apitest50”,
“Sender”: {
“OdsCode”: “SEN20”,
“Organisation”: “Docman Hospital”,
“Department”: “A&E”,
“Person”: “Dr Doctor”,
“Group”:”Discharge Summary”
Then you will achieve the same result when seeing the document in the Connect Console:

If you have any questions regarding Groups, please contact either the Projects Team if you are still in Deployment Phase, or the Support Desk if in Business as Usual.
Projects: dm.logistics@oneadvanced.com
Support Desk: https://customers.oneadvanced.com