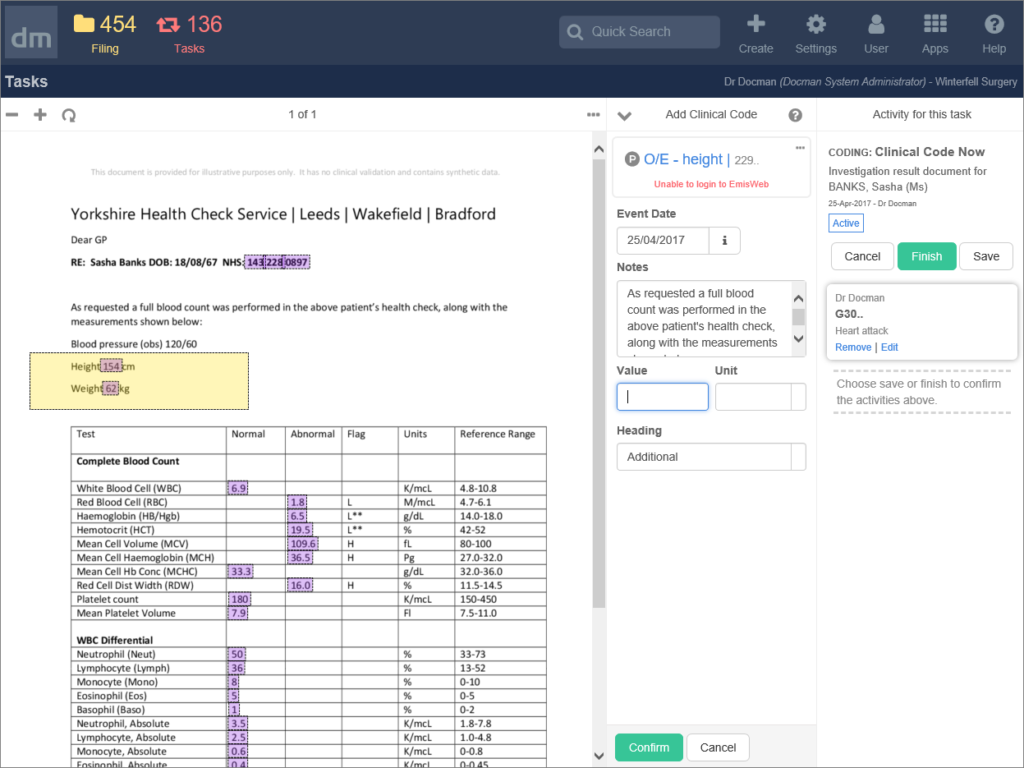
Clinical coding is a great way to use Docman to associate READ or SNOMED codes with a document and post the entries through to your clinical system. You can use the document preview shown to select areas to code and Docman can be used to suggest terms for you e.g. blood pressure readings, if they can be detected in the document.
Create a clinical coding task
Clinical coding tasks can be created from task templates and shown on the action panel in the task inbox. We’ve prepared another article on how to create task templates and you can read that here.
Perform Clinical Coding
The task cards that are created for clinical coding tasks are prefixed with ‘CODING’ so you should be able to spot these easily in your task inbox, you could even create a view to show just these tasks if you wish. We’ve covered how to create a view of tasks in this article here.
There are a couple of ways that you can search for a clinical code:
- Add Clinical Code option on the action panel.
- Lasso or select an area on the document that contains the words you need to start the search
Using the term browser
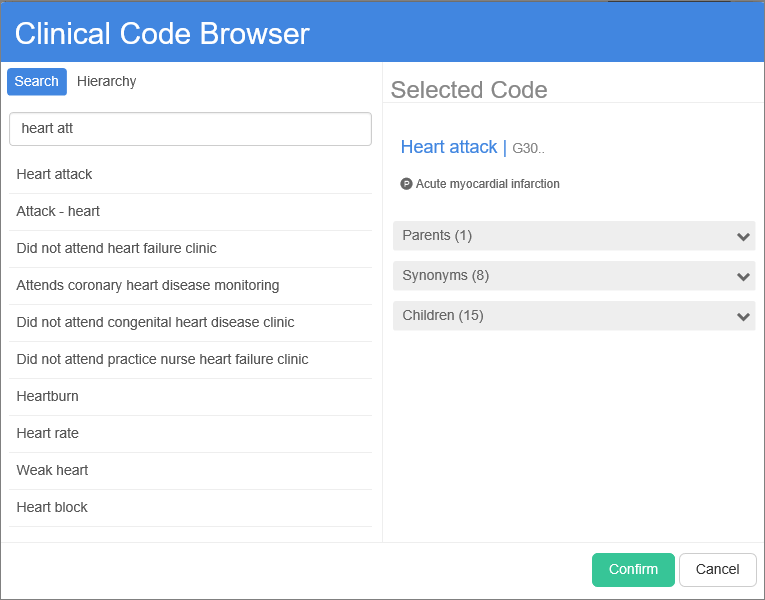
The term browser is launched when you select the add clinical code action on the panel. This allows you to search and select the term you need. The browser responds as you type, suggesting values based on the criteria you enter. When an item is selected from the results, it’s shown on the right with more detail, including the term ID/code, full description and if there is a preferred term available it will be shown.
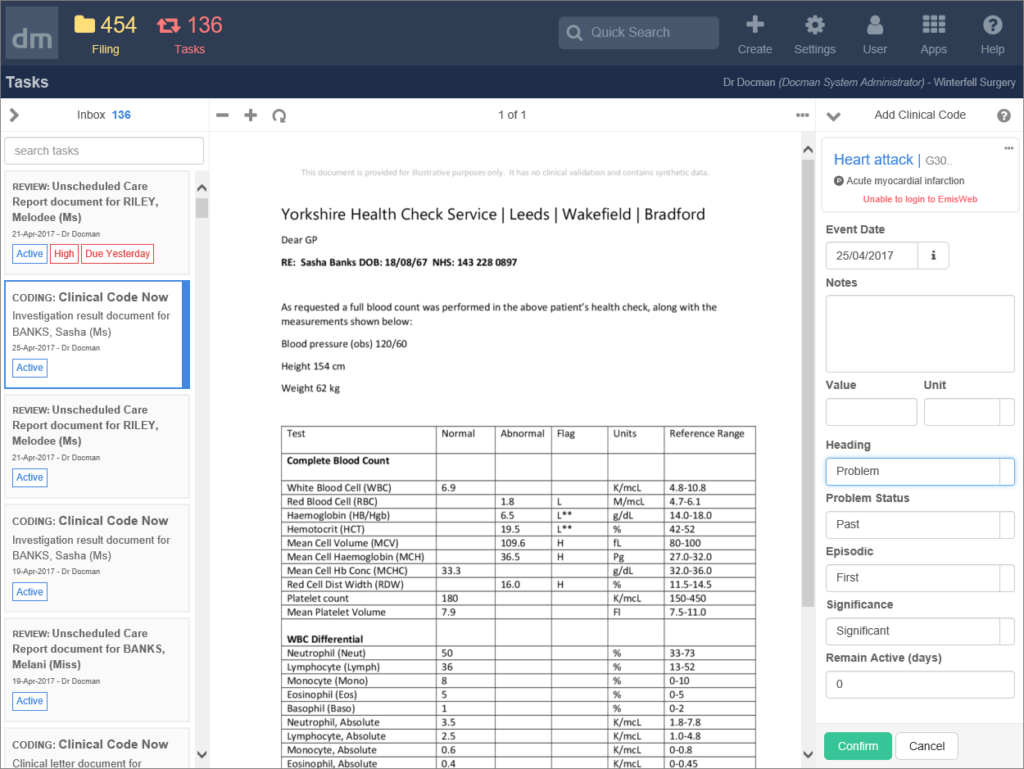
When you confirm, the term is shown on the action panel with options shown for you to add more detail.
When you’re happy with the term, confirm and the detail moves over to the right so that you can continue to add codes.
Codes are sent to the clinical system when you select finish or save. Finish will send the codes and complete the active coding task whereas save will send the codes but not finish the active coding task.
Using the document preview to drive search
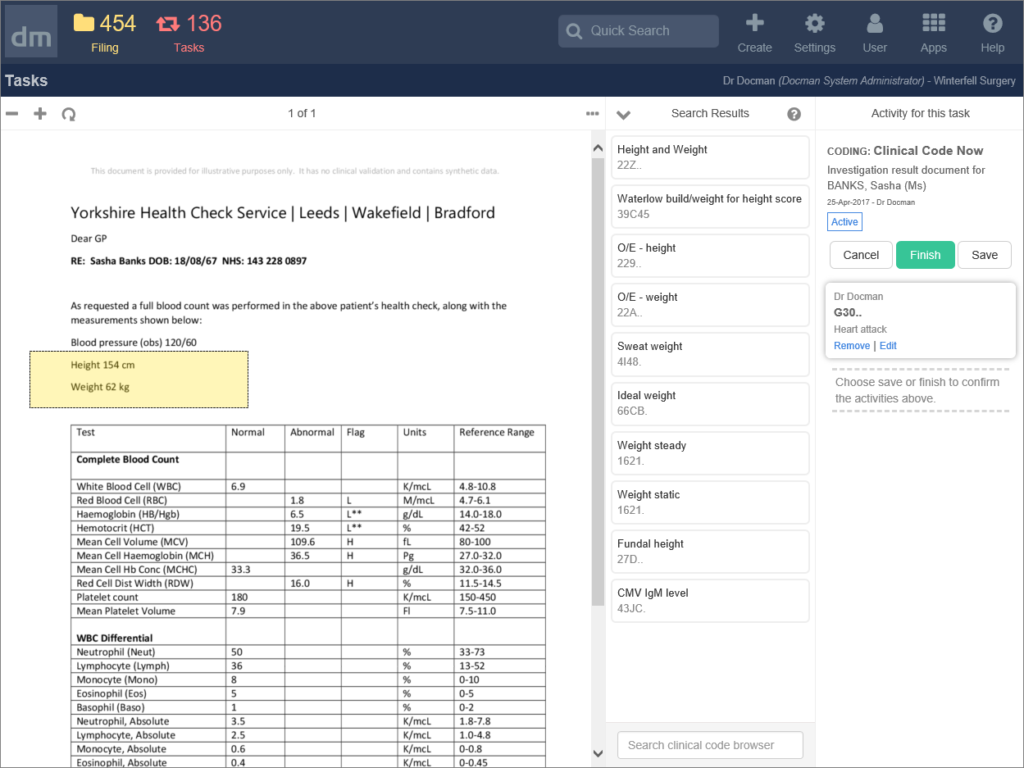
When you move your mouse over the document preview area, the pointer icon should change to the cross-hair. Use this to select an area on the document to start a search based on the words within the area you have selected.
Select the term you need from the results and if you need to add more detail on the next screen you can continue to use the document preview to help you add notes and values.
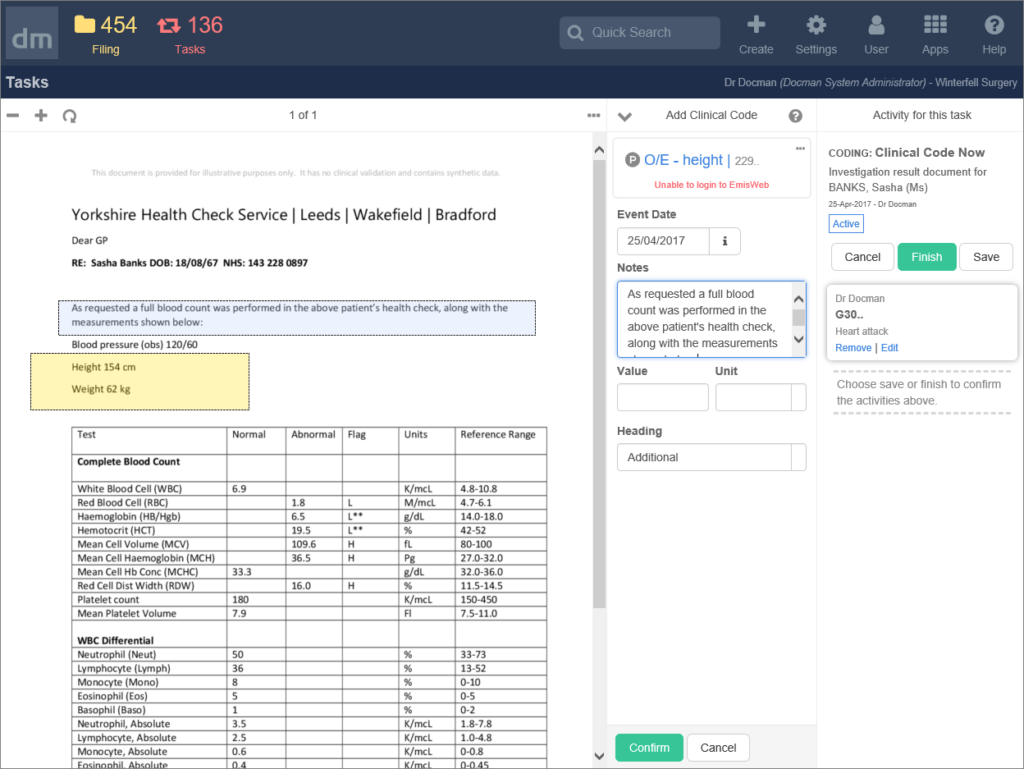
To add notes, select the notes area on the panel, now move over the document preview and select any text from the document you’d like to add to the notes area. Or you can just type text straight in.
The add values, select the value area on the panel. Any values detected in the letter should be highlighted on screen.
Select one of the highlighted values and if the system can detect a unit for the value (and the value has been configured in system settings), it will be added into the unit area.
When you’re happy with information you’ve added for the term, confirm and the detail moves over to the right so that you can continue to add codes.
Codes are sent to the clinical system when you select finish or save. Finish will send the codes and complete the active coding task whereas save will send the codes but not finish the active coding task.


