
Why is it so Important to create Views and how do you create a view?
We create views to gain easy access to another users/groups inbox, we may need to gain access to their tasks to action them, if the user goes on holiday or suddenly has to leave work or we might be in another group and want to have access to another groups Inbox.
To create a User Inbox View
Click on Settings in the Notification bar

Click on Tasks and then on Views
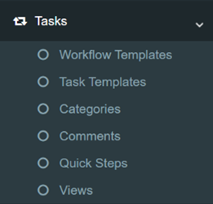
Click on Create New View at the bottom of the screen
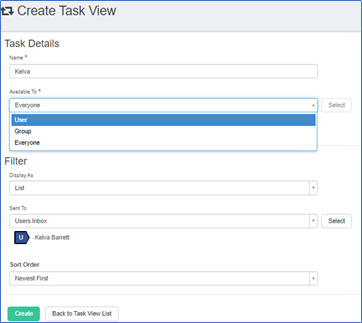
Name the View as per the inbox you are setting up to view.
Choose who you want to make it available to, choices include – User, Group or Everyone.
Select the User by clicking Select underneath the Filter header.
Click Create.
NB. Users Inbox in the ‘Sent to’ field will show any active Tasks in the user’s inbox that you define in the Select field. INCLUDING any sent to that user as part of any groups the user is in.
Create a User View
Just as before you will select Create New View. Name the view to correspond to the User you are setting the View for.
The difference with the Sent to: User selection, this View allows you to set further filters if required. See the image below.

The image here shows a simple View with filters applied to display Active Patient content, Newest First.
Other filters allow you to search for Completed Tasks, Sent by particular Users, Task types, priorities. If this maybe of use to your practice?
NB. This view would only display Tasks sent directly to this user, not part of any groups. It’s a convenient way of filtering content between individuals and the groups they are part of. Even the named user can use this as a filter.
Create a Group View
As before, create new task, name it after the group you wish to create a view for.
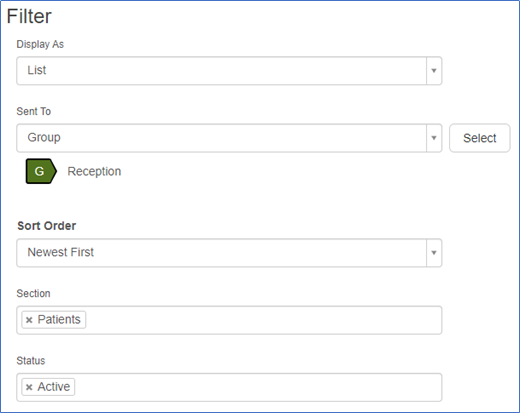
And in the Sent To field, change this to Group and then Select your group name.
The same filters are available as the previous ‘User’ template you saw, and the Best Practice: Active, Patient View settings have been defined above.
Copy Templates
Once you have created a template for a User, Group or Users Inbox, you can also Copy & Create a new template from an existing item, saving time and effort.
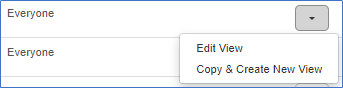
On the right-hand side, click on the Action tab, and you will see Copy & Create New View. This will open a new view with the same config as the View you have just copied. Simply change the Name and the Sent To fields and Create.
This article has been created by Kelva Barrett (Training and Implementation Consultant)